DIY pressed flowers home decor projects are one of those rare creative pursuits that feel both meditative in the making and genuinely stunning in the result. There is something almost alchemical about taking a garden bloom at peak perfection, pressing it flat between heavy pages, and watching it transform into a piece of art that lasts for years. Pressed botanicals carry a softness that no printed wallpaper or mass-produced print can replicate — they hold the memory of light, season and texture in every delicate petal. Whether you have a windowsill herb garden, a grocery store bunch of wildflowers or a single rose saved from a special occasion, you already have everything you need to begin. These eleven projects range from genuinely effortless afternoon crafts to slightly more involved weekend makes, but every single one is approachable, affordable and deeply satisfying. Think of this as your invitation to bring the outside world in — one pressed petal at a time.
1. Pressed Flowers Ideas for Framed Botanical Wall Art
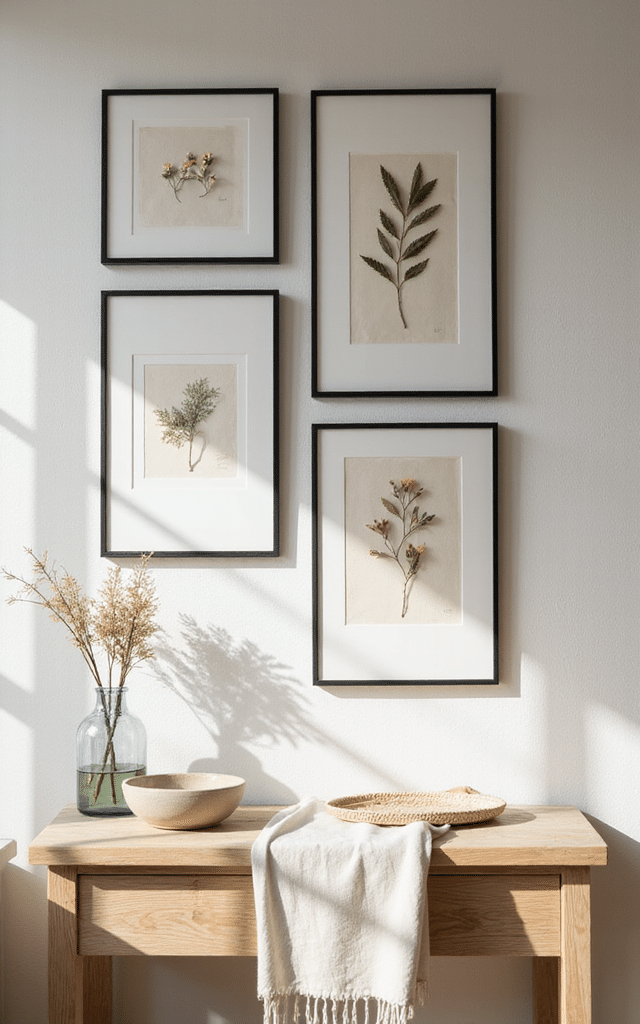
Framed pressed botanicals are the foundation of this entire craft world, and for good reason. A single stem of Queen Anne’s lace or a cluster of violas arranged on cream linen inside a simple oak frame can feel as considered as a gallery print. This is the project that turns a blank wall into a quiet, breathing moment of nature.
Why this works:
– Pressed flowers introduce organic asymmetry that softens overly styled spaces
– Layering multiple frames in varying sizes creates a curated gallery wall effect
– Neutral backgrounds like cream, black or sage linen let the botanical details sing
– Matching frame finishes ties a collection together even when the flowers vary widely
Materials needed:
– Fresh flowers and leaves of your choice
– Heavy books or a flower press
– Absorbent paper or parchment
– Picture frames in your preferred size and finish
– Background material such as linen, watercolour paper or card stock
– Tweezers for positioning delicate blooms
– A small amount of clear-drying craft glue or floral adhesive
How to make it:
– Press your chosen flowers between absorbent paper inside a heavy book for 2 to 3 weeks until fully dried and flat
– Cut your background material to fit the frame and choose a placement that feels balanced but not overly symmetrical
– Using tweezers, gently position flowers on the background and secure with tiny dots of clear-drying craft glue
– Allow to dry completely before sealing inside the frame
– Hang in a spot away from direct sunlight to preserve the colour as long as possible
2. Pressed Flowers Ideas for a Handmade Resin Tray
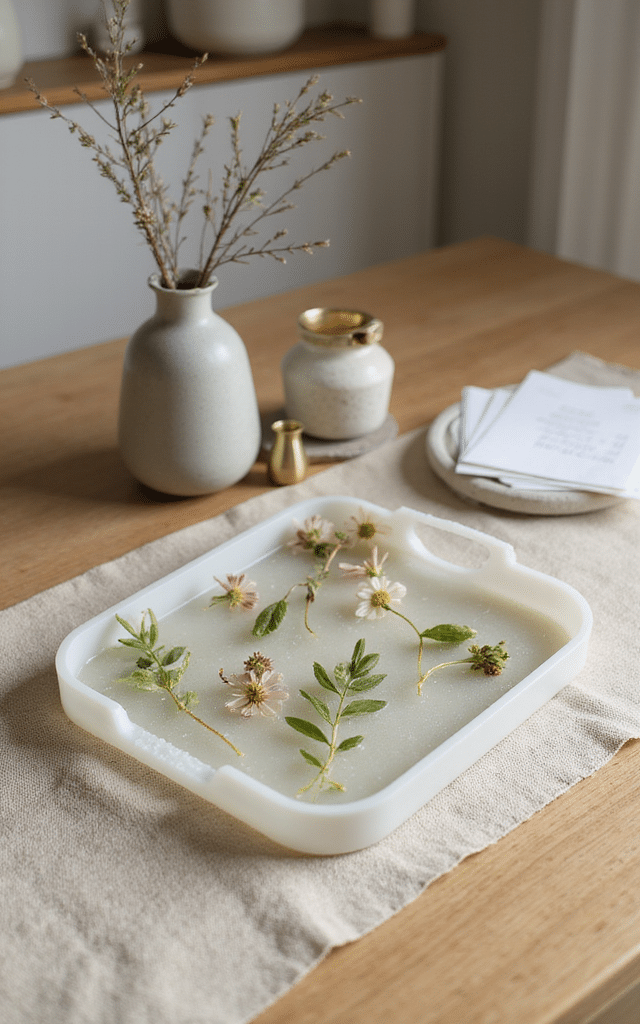
A resin tray embedded with pressed flowers is the kind of piece that sits on a coffee table and invites every single guest to pick it up and examine it more closely. The way light passes through clear resin and catches the translucent petals beneath creates an effect that looks expensive and entirely one of a kind.
Pro tip:
– Work in a dust-free environment when pouring resin to avoid bubbles and debris
– Choose flowers with flat profiles like pansies, daisies or ferns for the cleanest result
– A heat gun or torch passed quickly over wet resin removes surface bubbles beautifully
– Add a second thin pour of resin over the flowers once the first layer cures to fully encapsulate them
Materials needed:
– Silicone tray mould
– Two-part epoxy resin and hardener
– Pressed and fully dried flowers
– Mixing cups and stir sticks
– Gloves and a protective work surface
– Optional metallic pigment powder for added depth
How to make it:
– Mix resin and hardener according to package instructions and pour a thin base layer into the mould
– Allow to cure until tacky, then arrange your pressed flowers face-down on the surface
– Pour a second layer of resin to fully cover the flowers and fill the mould
– Use a heat gun to remove surface bubbles and leave to cure for the full recommended time
– Demould carefully and sand any rough edges with fine-grit sandpaper before using
3. Pressed Flowers Ideas for Custom Candle Holders
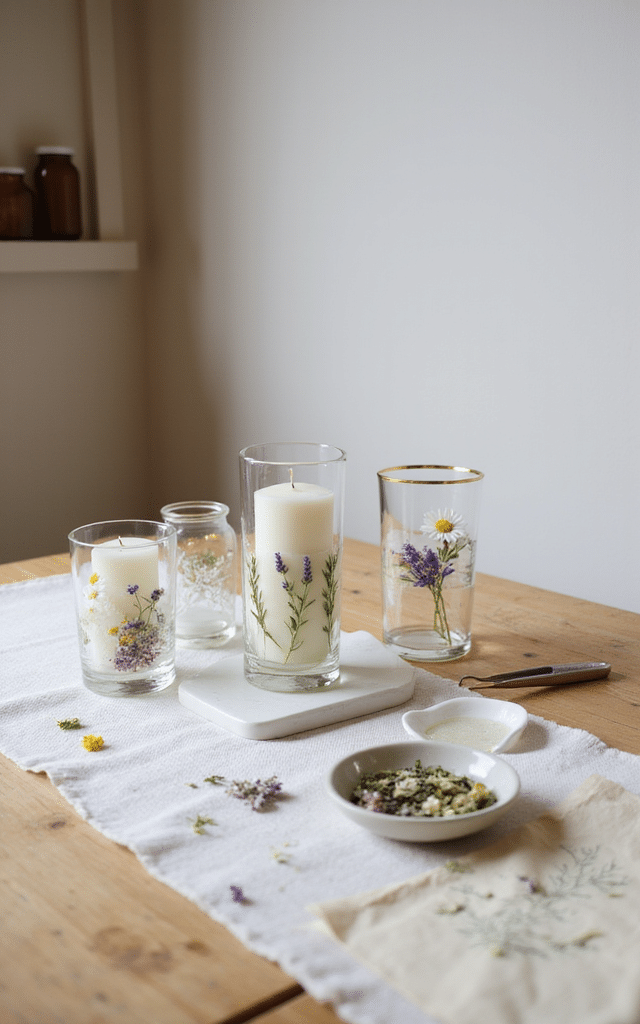
There is something deeply atmospheric about candlelight filtering through pressed petals pressed against glass. A plain pillar candle or glass votive becomes something genuinely special when dressed with botanicals — the warm glow picks up the amber and blush tones in the dried flowers and casts the most extraordinary shadows on surrounding walls.
Why this works:
– The translucency of dried petals paired with candlelight creates a lantern-like, romantic effect
– This project works beautifully as a handmade gift or centrepiece for a dinner table
– Varying the flower types across a set of candle holders creates a cohesive but varied collection
– Using Mod Podge to adhere flowers keeps the look clean and the process simple
Materials needed:
– Glass candle holders or clean glass jars
– Pressed dried flowers
– Mod Podge or decoupage glue
– A soft brush
– Tea light or pillar candles
How to make it:
– Clean the glass surface thoroughly and ensure it is completely dry
– Brush a thin layer of Mod Podge onto a small section of the glass
– Press a dried flower gently onto the glued area using your fingers, smoothing out any air pockets
– Brush a thin sealing coat of Mod Podge over the top of each flower once all are in place
– Allow to dry completely before placing a candle inside and lighting
4. Pressed Flowers Ideas for Decorative Bookmarks
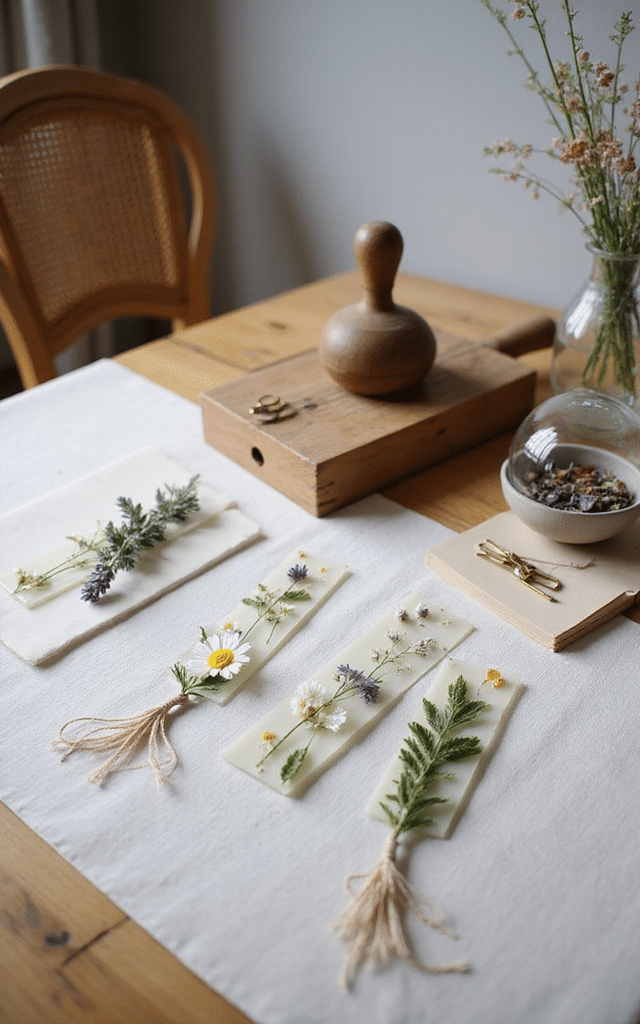
These are small but deeply satisfying to make — and they have a way of turning an everyday reading habit into something that feels a little more considered. A laminated pressed flower bookmark slipped between the pages of a hardback feels like a gift you give yourself every single time you sit down to read.
Pro tip:
– Use a mix of tiny blooms and single leaves to create varied compositions on each bookmark
– Kraft card provides a warm, natural backdrop that complements most dried flower colours
– Gold ribbon threaded through a punched hole at the top adds a finishing touch
– Making a set of four or five at once makes a beautiful packaged gift
Materials needed:
– Thick card stock or kraft card cut to bookmark size
– Pressed flowers and leaves
– Clear-drying glue
– Laminator and laminating pouches or clear contact paper
– Hole punch and decorative ribbon
How to make it:
– Cut card into strips approximately 5cm by 18cm
– Arrange pressed flowers on the card and glue in place using a minimal amount of clear-drying adhesive
– Allow to dry fully before laminating or covering with clear contact paper
– Trim any excess laminate from the edges and punch a hole at the top
– Thread a length of ribbon through the hole and knot to finish
5. Pressed Flowers Ideas for Personalized Greeting Cards
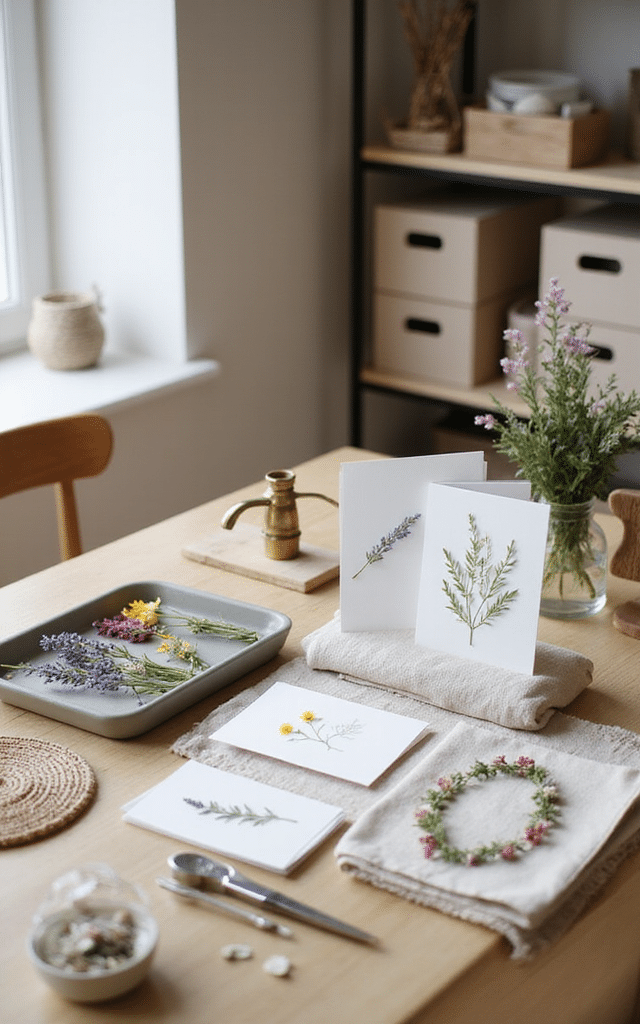
A handmade card with a pressed flower feels like a letter in a world of text messages — it slows everything down. Whether it is a birthday, a thank you or simply a note to say you were thinking of someone, a botanical card carries a warmth and intention that no printed card from a shop can match.
Why this works:
– Handmade cards are kept far longer than store-bought ones, making the effort worthwhile
– Simple compositions with a single stem look more elegant than overcrowded designs
– Writing a personal message inside amplifies the emotional weight of the handmade front
– A set of blank pressed flower cards makes an impressive and thoughtful stationery gift
Materials needed:
– Blank fold-over card stock in white, cream or soft colour
– Pressed flowers and foliage
– Clear-drying craft glue
– Tweezers
– Optional watercolour washes for background detail
How to make it:
– Choose a single pressed flower or small botanical arrangement as your focal point
– If desired, apply a soft watercolour wash to the card front and allow to dry fully
– Using tweezers, position your pressed flowers and glue in place with minimal adhesive
– Allow the glue to dry completely before handling
– Write your message inside and consider pairing with a wax seal on the envelope for an extra beautiful finish
6. Pressed Flowers Ideas for a Floral Glass Vase Display
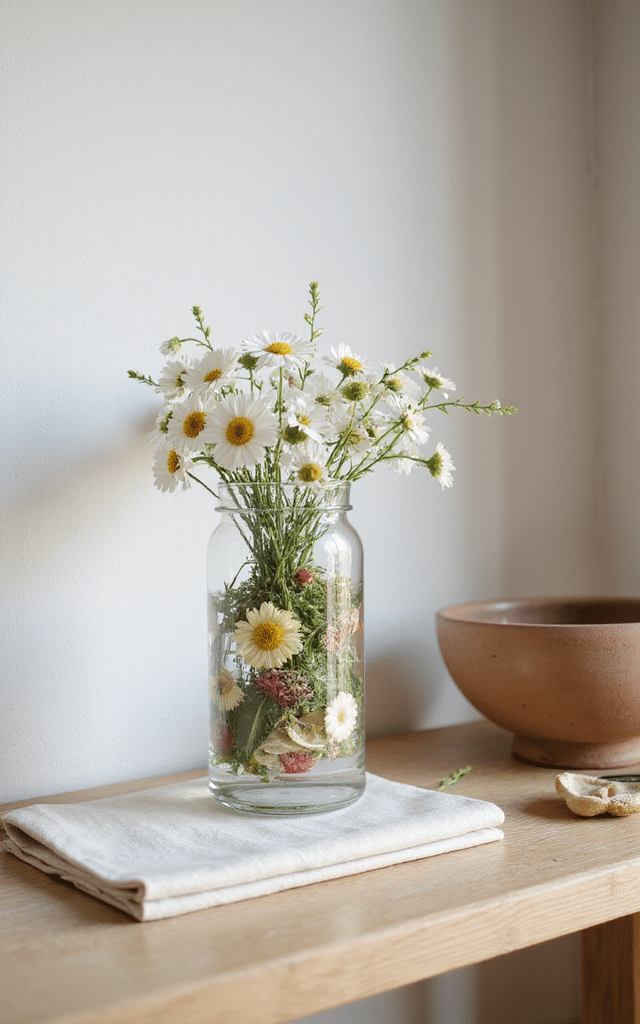
This clever project transforms a plain glass vase into a botanical art piece by sandwiching pressed flowers between two glass vessels of different sizes. The effect is architectural, delicate and endlessly photogenic — and it requires no special skills, just a steady hand and a good eye for arrangement.
Pro tip:
– Choose a smaller glass vase that fits snugly inside a larger one, leaving a uniform gap between them
– Fill the gap with pressed flowers arranged using long tweezers or a chopstick
– Mixing flat leaves with dimensional petals creates interesting depth and texture
– Place near a window so natural light can illuminate the botanical layer from behind
Materials needed:
– Two glass vases of different sizes, one fitting inside the other
– Pressed flowers, ferns and leaves
– Long tweezers or a chopstick for positioning
– Optional clear adhesive to secure flowers in place
– Fresh or faux stems for the inner vase
How to make it:
– Place the smaller vase inside the larger one and assess the gap between them
– Begin pressing flowers down into the gap using tweezers, starting at the base and working upward
– Alternate flower types and orientations for a natural, unforced arrangement
– Once the gap is filled to your satisfaction, place fresh or faux stems in the inner vase
– Display on a sideboard, shelf or windowsill where the light will do its best work
7. Pressed Flowers Ideas for Lampshade Embellishment
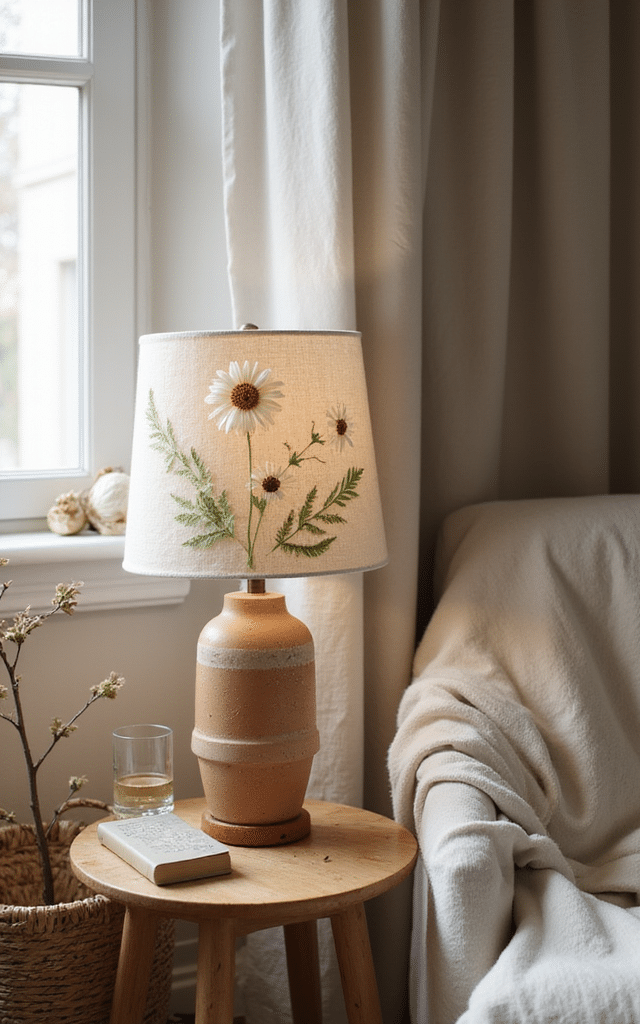
Transforming a plain white lampshade with pressed botanicals is one of the most unexpectedly impactful home decor moves you can make. When the lamp is switched on, the petals glow as if lit from within — creating the effect of light passing through stained glass but with an entirely natural, organic quality.
Why this works:
– The heat from a bulb very gently warms the petals, releasing a faint floral scent when first used
– Thin, translucent petals like those from pansies or cosmos work best for the backlighting effect
– A white or off-white lampshade provides the cleanest canvas for botanical silhouettes
– This project dramatically elevates a budget lampshade with minimal cost
Materials needed:
– A plain fabric or paper lampshade
– Pressed flowers and leaves
– Mod Podge or fabric glue
– A soft brush
– LED bulb for safe use with organic materials
How to make it:
– Ensure the lampshade is clean and dry before beginning
– Brush a thin layer of Mod Podge onto the lampshade surface in the area where you intend to place a flower
– Gently press dried botanicals onto the glued area, smoothing carefully with your fingertips
– Apply a thin sealing coat of Mod Podge over the top of each element once all are positioned
– Allow to dry fully before fitting the shade and always use an LED bulb to minimise heat
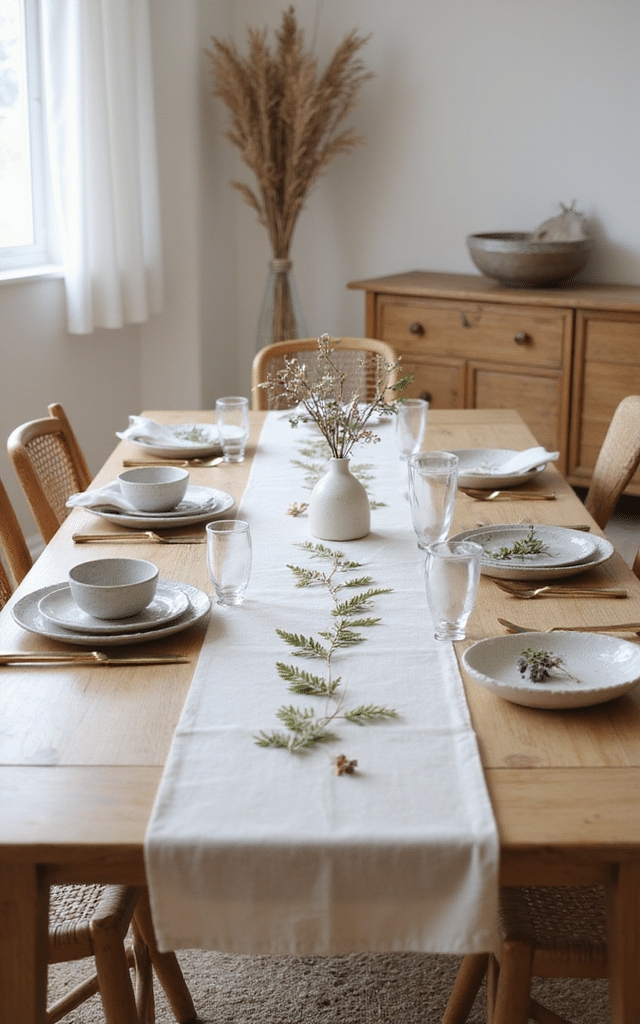
8. Pressed Flowers Ideas for a Botanical Table Runner
 ю
ю
Imagine a linen table runner scattered with pressed flowers sealed under a matte varnish — it is the kind of detail that makes a dinner table feel like it has been styled for a magazine shoot while remaining entirely your own creation. This project takes patience but rewards you with something genuinely beautiful and conversation-worthy.
Pro tip:
– Use a linen or cotton canvas runner for the most elegant, natural base
– Seal the pressed flowers with a matte decoupage medium to prevent lifting at the edges
– Cluster flowers in an organic, asymmetric pattern rather than spacing them evenly
– This also works beautifully on paper table runners for a more temporary celebration setting
Materials needed:
– A plain linen or cotton table runner
– Pressed and dried flowers and leaves
– Fabric-compatible Mod Podge or matte decoupage medium
– A soft wide brush
– An iron and pressing cloth for prep
How to make it:
– Iron the table runner smooth and lay it flat on a clean work surface
– Arrange pressed flowers across the runner until you are happy with the composition, then glue in place
– Brush a thin layer of Mod Podge over each flower and a slightly larger surrounding area to secure edges
– Work in sections and allow each to dry before moving on
– Once fully dry, apply one final thin sealing coat across the entire surface and allow to cure overnight
9. Pressed Flowers Ideas for Framed Mirror Borders
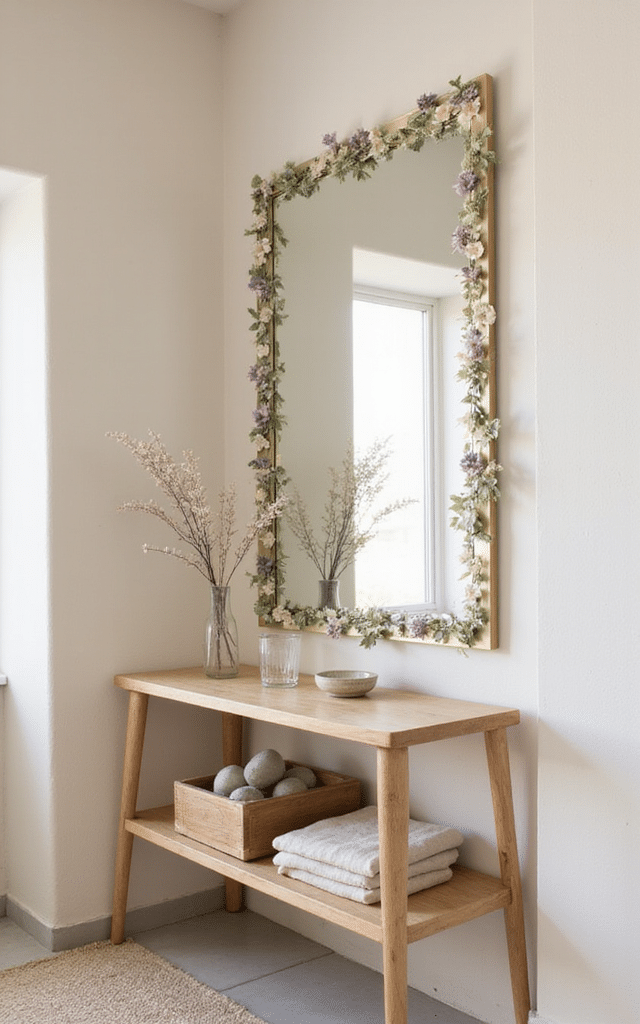
A plain bathroom or hallway mirror becomes a considered design moment when its frame is dressed with pressed botanicals. Glued along the inner border and sealed with a clear finish, dried flowers add a softness and romance that traditional frames simply cannot replicate — and the reflection doubles the botanical effect in the most satisfying way.
Why this works:
– Mirrors amplify the visual impact of pressed botanicals by reflecting the arrangement back into the room
– This project works on both framed and frameless mirrors using the right adhesive
– Pressing flowers in a consistent colour palette creates a more unified, intentional look
– Sealing thoroughly is essential in bathrooms where humidity can affect dried botanicals over time
Materials needed:
– A mirror with a flat border or frame
– Pressed flowers, ferns and small leaves
– E6000 adhesive or strong clear-drying craft glue
– A waterproof sealant spray
– Tweezers and a steady hand
How to make it:
– Clean the mirror frame surface and allow to dry completely
– Plan your arrangement by laying flowers along the frame before committing to gluing
– Apply small dots of adhesive and press each botanical gently into place using tweezers
– Allow to dry for at least 24 hours before applying two coats of waterproof sealant spray
– Hang in position and allow the sealant to fully cure before exposing to any moisture
10. Pressed Flowers Ideas for a DIY Botanical Mobile
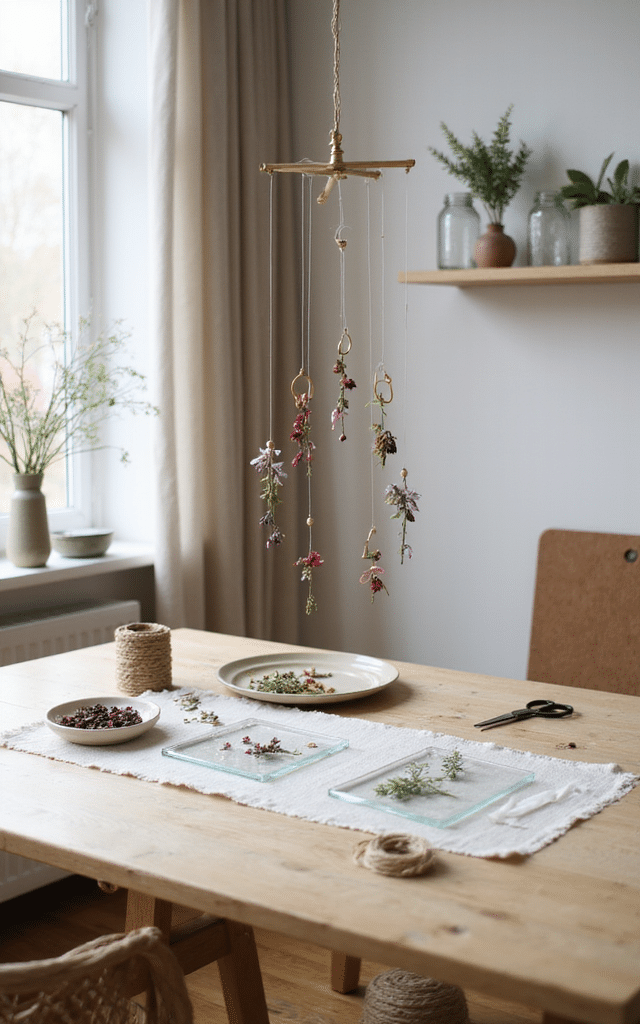
A pressed flower mobile is the kind of piece that makes a room feel alive with movement and light. Hung in a nursery, above a reading nook or in front of a window, dried botanicals suspended from fine thread and a simple branch catch every breath of air and send the gentlest shadows dancing across walls and ceilings.
Pro tip:
– Use laminated pressed flowers to give each piece durability and a slight shimmer
– Vary the lengths of thread for a cascading, organic effect
– A foraged branch or a length of driftwood makes the most beautiful natural hanging bar
– Mixing botanicals with small painted shapes or paper circles adds visual rhythm
Materials needed:
– Pressed and laminated flowers and leaves
– A foraged branch, dowel or piece of driftwood
– Fine thread or fishing line
– A hole punch
– Scissors and twine or leather cord for the hanging loop
How to make it:
– Laminate your pressed flowers and punch a small hole at the top of each piece
– Cut lengths of fine thread in varying sizes and thread through each botanical, knotting to secure
– Tie the other end of each thread to your branch, distributing the weight evenly
– Add a hanging loop of twine at both ends of the branch to create a balanced suspension
– Hang near a window and allow the natural airflow to bring the mobile to life
11. Pressed Flowers Ideas for DIY Floral Coasters
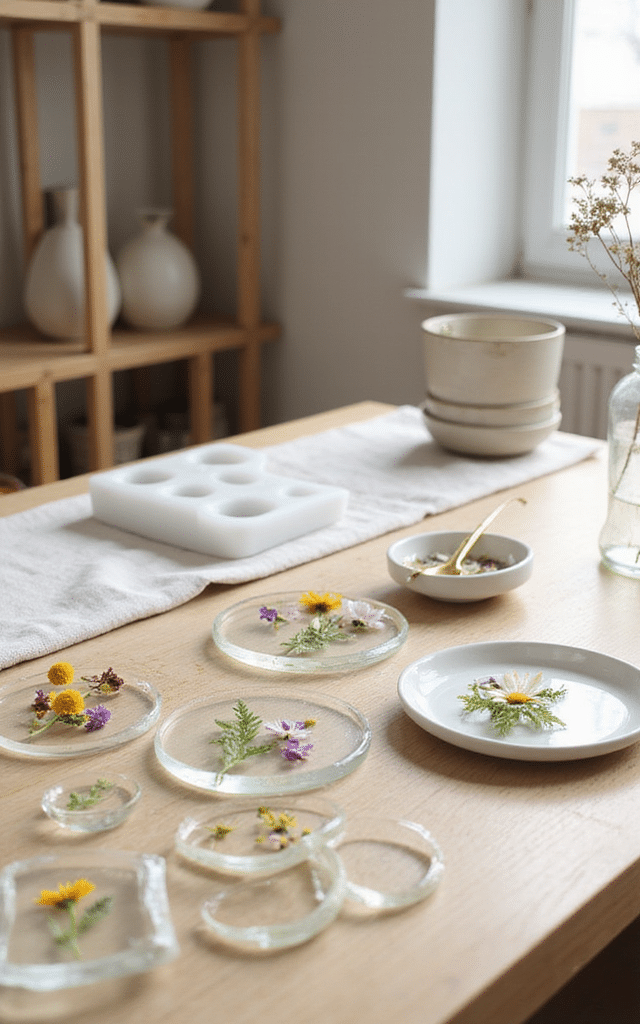
Pressed flower coasters are one of those projects that feel almost impossibly rewarding for the effort involved. Set out on a coffee table, they function as both practical objects and miniature works of art — and every cup of tea placed down on one becomes a small, considered ritual. Made in sets, they are also among the most universally loved handmade gifts.
Why this works:
– Resin encapsulation makes coasters fully waterproof and durable for everyday use
– Soft circular or square silicone moulds give clean, professional-looking results
– Mixing different flower types across a set creates a cohesive series with individual character
– A cork backing sheet cut to size protects surfaces and adds a polished finishing touch
Materials needed:
– Silicone coaster moulds
– Two-part epoxy resin and hardener
– Pressed and dried flowers
– Mixing cups, stir sticks and gloves
– Cork sheet and scissors or a craft knife
– Strong adhesive for attaching cork backing
How to make it:
– Mix resin according to package instructions and pour a thin base layer into each mould
– Allow to cure until tacky, then arrange pressed flowers face-down on the surface of each coaster
– Pour a second full layer of resin to encapsulate the flowers completely and fill the mould to the top
– Use a heat gun to remove any surface bubbles and allow to cure fully for the recommended time
– Demould, sand any rough edges if needed, cut cork to size and adhere to the base of each coaster with strong glue
What all eleven of these projects share is a quality that is increasingly rare in the spaces we inhabit — they are made with attention, with care and with material that was once alive. Pressed flowers bring a softness into interiors that no amount of considered furniture buying or carefully chosen paint colour can quite replicate. They are imperfect in the most beautiful way, carrying the subtle variations of each bloom, the slightly uneven edges of a leaf, the memory of a specific summer afternoon. Whether you begin with a single framed botanical above a writing desk or work your way through a full set of resin coasters for a dining table, each project invites you to slow down and engage with your home in a more intentional, tactile way. The best interiors tell a story about the person who lives inside them, and there is no warmer story to tell than one that begins in a garden. Start small, trust your eye and do not be precious about perfection — nature never is. If any of these projects sparked something for you, save this article to your Pinterest boards so you can come back to it whenever you are ready to press your first petal.